Tag: Tutorials

  • How to Install Mac on Linux: A Comprehensive Guide

    Are you an enthusiast of the Linux operating system who wants to experiment with macOS but not abandon your primary Linux system? In this blog post, I’ll guide you through every step detailing how to install a Mac on Linux. Buckle up; it’s going to be a fruitful ride!

    What You Will Need

    Before delving into the process, it’s vital to gather the prerequisites. Here’s a list of what you’ll need:

    • Computer 🙂
    • A stable Internet connection
    • A Linux system (Any popular distribution will work, I suggest using some Debian-based distro)
    • Enough storage space
    • Patience (Trust me; you’ll need it!)

    The Preparation

    Before we install Mac on Linux, we must first prepare the system. Disk space and partitioning are crucial at this stage, not forgetting to back up your essential files.

    Installing a Virtual Machine

    We’re going to install macOS using a virtual machine (VM), which you can think of as a computer within a computer, sounds like Inception, right?

    To install a VM on Linux, open your terminal (Ctrl+Alt+T) and input the following command:

    sudo apt-get install qemu-kvm libvirt-bin ubuntu-vm-builder bridge-utils

    Provide your superuser password, and the software will install automatically.

    Downloading macOS

    Downloading macOS is the next step to install macOS on Linux. Unfortunately, Apple doesn’t freely provide macOS ISO files like Linux distributions. However, there’s a workaround. You can download macOS using a script from GitHub. Before that, ensure you have git installed in your system. You can install git using the terminal:

    sudo apt-get install git

    After installing git, download the script to create the macOS ISO file:

    git clone https://github.com/myspaghetti/macos-guest-virtualbox.git

    Creating the macOS Virtual Machine

    After successfully downloading macOS, it’s now time to create the macOS virtual machine. Head back to the terminal and navigate to the script directory:

    cd macos-guest-virtualbox

    You’re ready to run the script:

    ./macos-guest-virtualbox.sh

    Follow the prompts and be patient; the script will download the necessary packages and create a macOS virtual machine.

    Wrapping Up the Installation Process

    Finally, in your VM, click the + symbol to create a new virtual machine. Name the newly created system, and select the operating system Apple Mac OS X and version as macOS 10.14 Mojave (or the version you’ve downloaded).

    GPU passthrough for acceleration

    You are running macOS on your virtual machine now, congratulations! The system should boot, and you should be able to use it, but something is missing, the system is choppy and it is really uncomfortable to even navigate through it, right? The reason for this is missing GPU, the system is rendered using a software method.

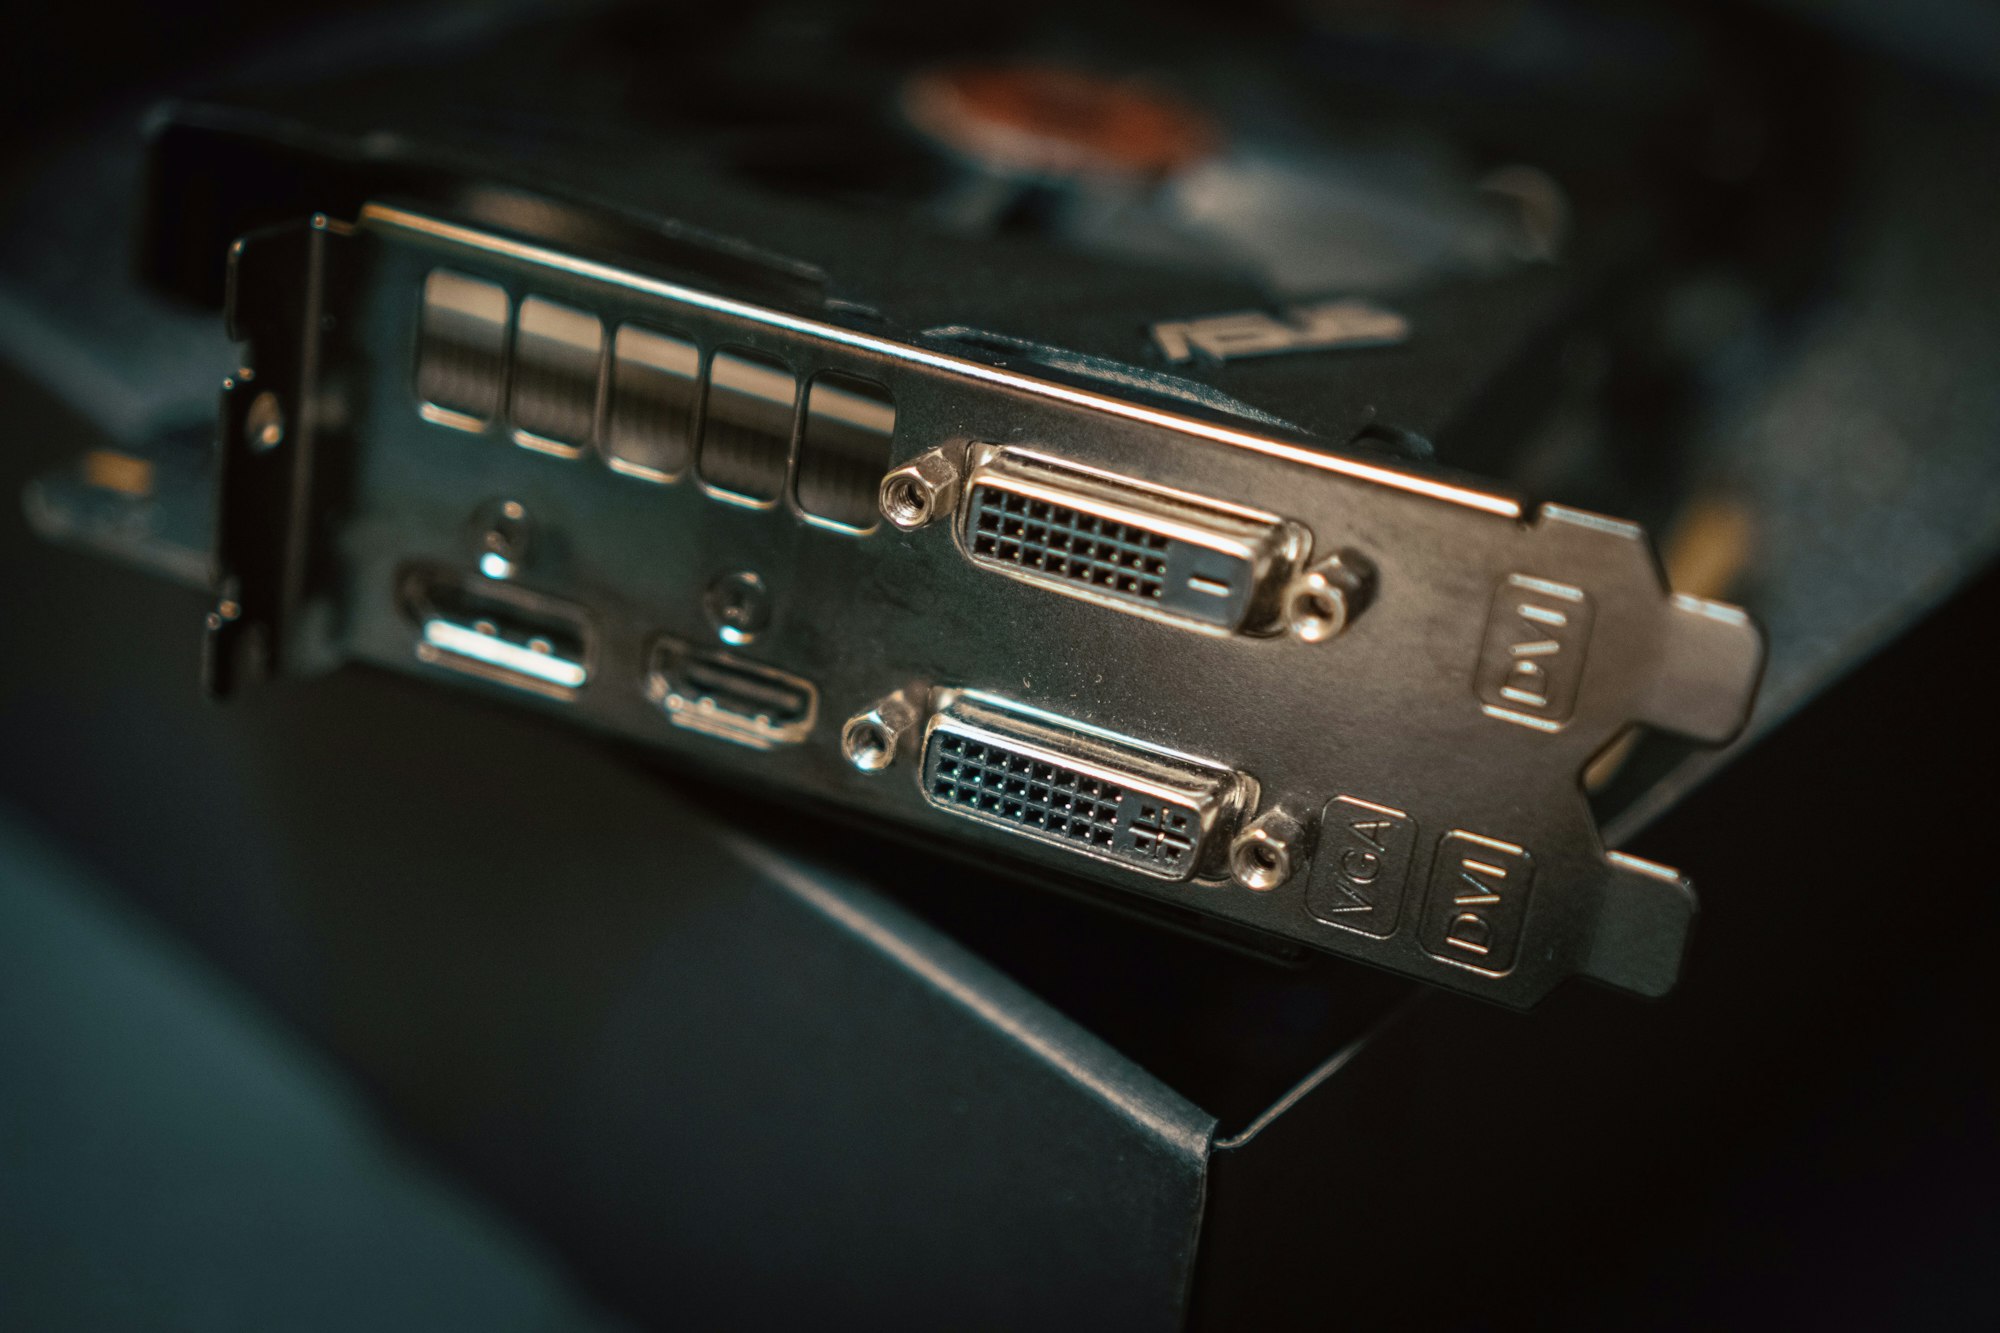
    Fortunately, there is a solution. If you have a graphics card made by AMD (it is possible to pass cards from other manufacturers too, but they usually don’t work with Mac, so there is no point in describing the process in this tutorial), you should be able to pass through this GPU to a VM running the macOS (check the list of supported GPUs here.
    silver electrical part
    Photo by Backpack Studio / Unsplash

    IOMMU, isolating GPU and other stuff

    Ok, assuming you have the right AMD GPU model, we can proceed with the configuration.

    Enable IOMMU / AMD-Vi Bios

    Ensure that your CPU and motherboard support IOMMU (Input-Output Memory Management Unit) technology. For AMD CPUs, this is often referred to as AMD-Vi or IOMMU technology. This option must be enabled in the BIOS of your motherboard, it can be usually found in advanced settings or CPU configuration.

    Configure grub to enable IOMMU

    Edit your bootloader’s kernel parameters to enable IOMMU. This typically involves adding amd_iommu=on (for AMD systems) to the GRUB configuration file (/etc/default/grub).

    After editing, update GRUB with sudo update-grub or a similar command, depending on your distribution.

    Bind GPU to VFIO driver

    Use the lspci command to list all PCI devices. Find your AMD GPU in the list and note its PCI address. The PCI address is usually in the format XX:XX.X.

    lspci -nn | grep -i amd

    Each device in a system belongs to an IOMMU group. Devices in the same group can access each other’s memory. For effective isolation, you want your GPU to be in its group or with devices that will also be passed through.

    for d in /sys/kernel/iommu_groups//devices/; don=$(basename $(realpath $d));echo "IOMMU Group ${d%%/*} $n $(lspci -nns $n)";done | sort -V

    Ensure the VFIO modules are loaded. You might need to load vfio, vfio_iommu_type1, vfio_pci, and vfio_virqfd.

    You will need to create a VFIO configuration to bind your GPU to VFIO at boot. This is often done by editing the modules configuration file or a dedicated VFIO configuration file depending on your distribution.Create a file, e.g., /etc/modprobe.d/vfio.conf.Add a line to bind the GPU to VFIO, using the GPU’s PCI IDs.ruby

      • options vfio-pci ids=1002:67df,1002:aaf0
        Replace 1002:67df,1002:aaf0 with the PCI IDs of your GPU and, if applicable, its associated audio device.

    After setting up the configuration, you need to update the initial RAM disk to ensure these changes are applied at boot.

    sudo update-initramfs -u

    After updating the initramfs, reboot your system. Upon reboot, the AMD GPU should be bound to the VFIO driver and not be available to the host system.

    Almost done! Now you have to open up your Virtual Manager and connect the pass the GPU to Virtual Machine MacOS.

    Good job!

    There you have it! You’ve successfully learned to install Mac on Linux via a VM. A new way to make a Hackintosh! It might seem daunting initially, but once you understand the ins and outs, it becomes a piece of cake!
    silver iMac ad wireless keyboard
    Photo by Patrick Ward / Unsplash

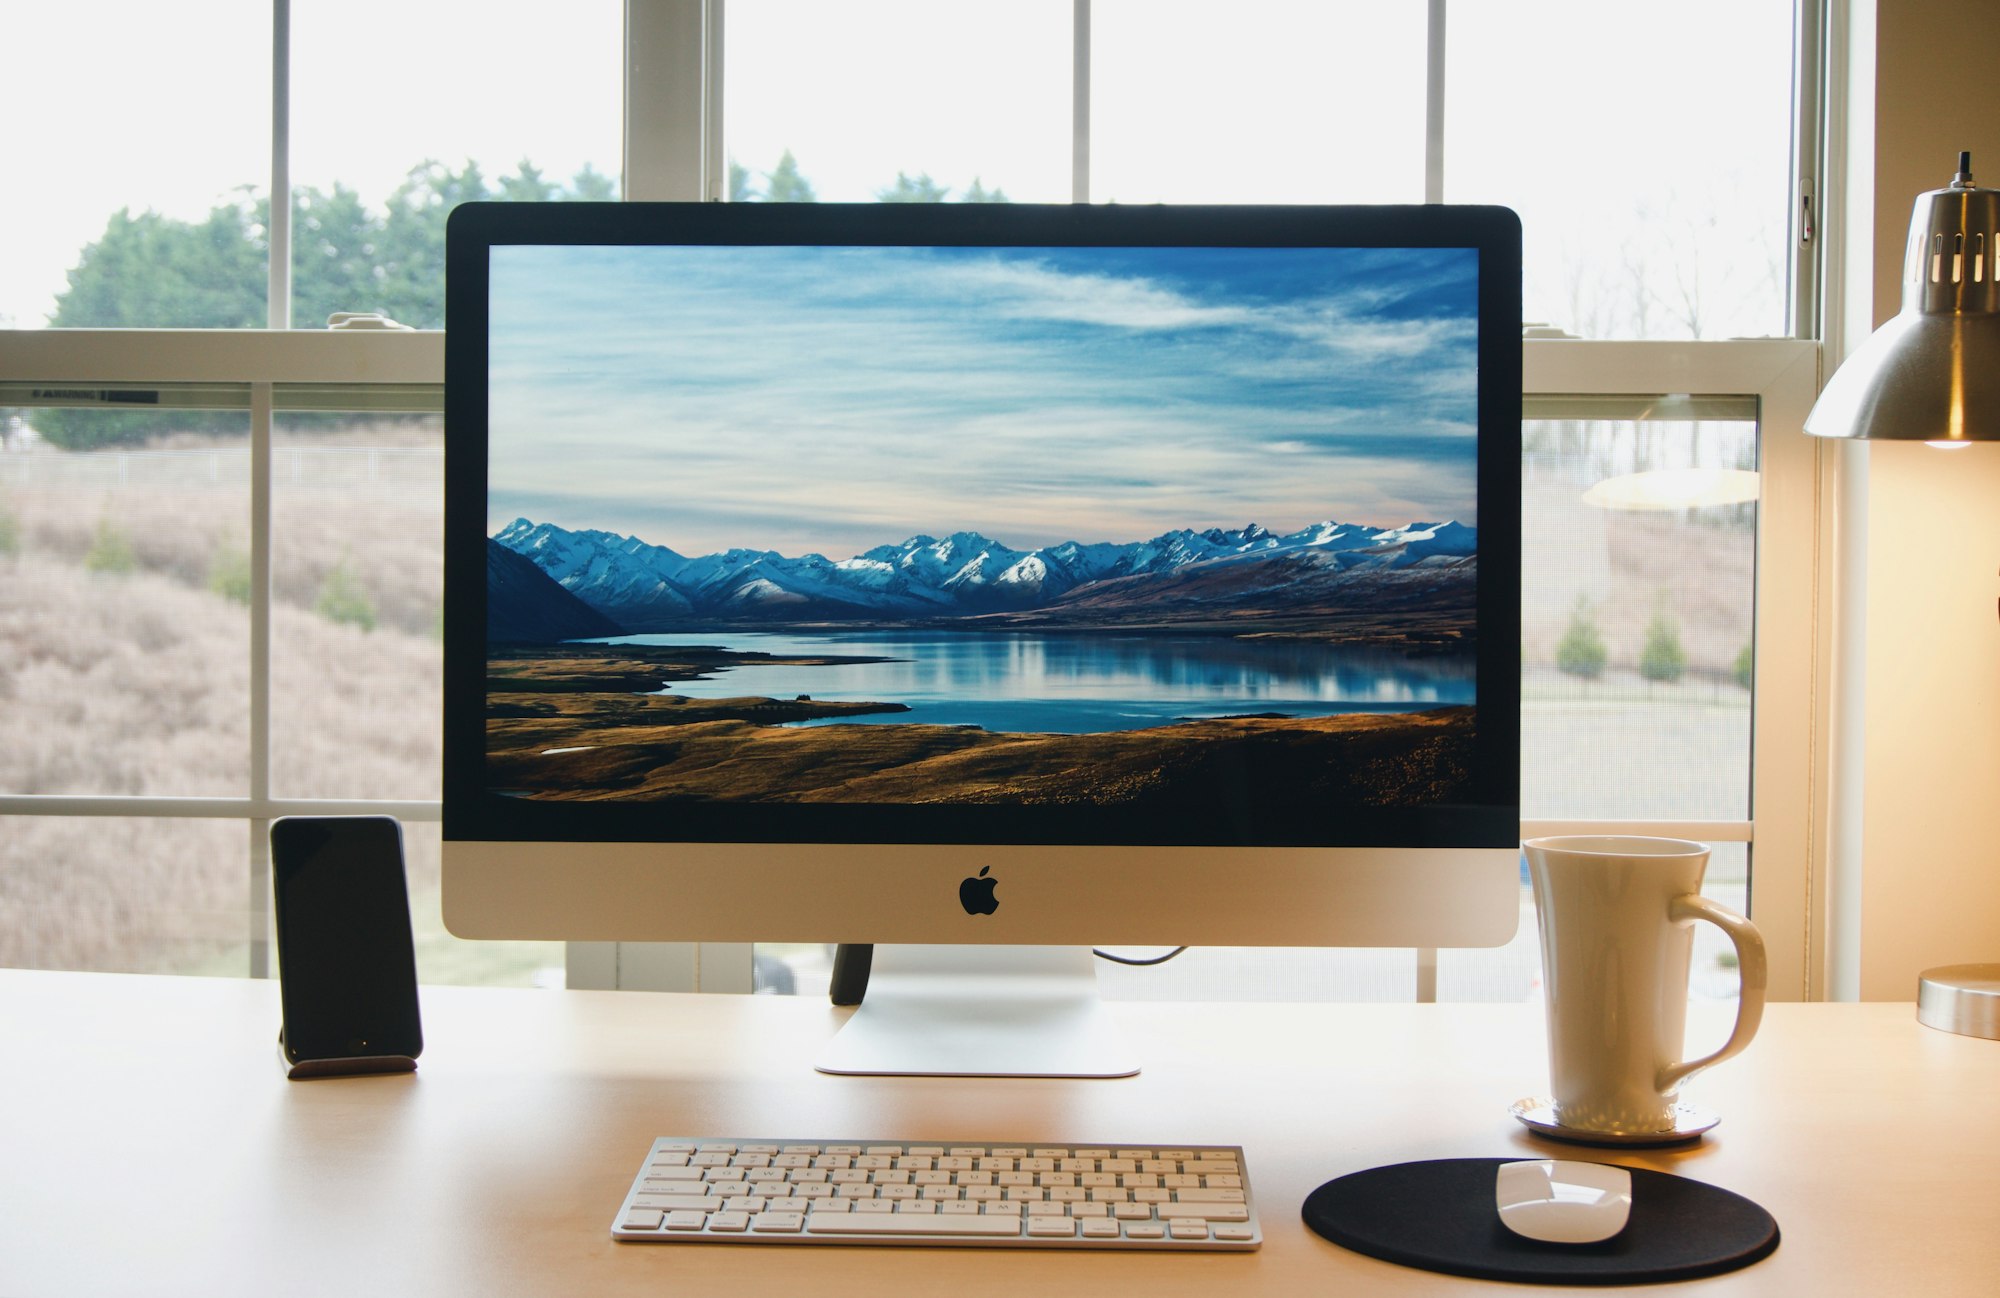
    Performance should be similar (and in some cases even better) to Apple-made Mac, enjoy!

    Remember, learning is a curve. Don’t fret if you encounter challenges along the way. Always consult forums and blog posts for those pesky errors; someone somewhere probably already figured out a solution. Happy computing!

    Disclaimer: The content in this tutorial is solely for educational purposes. Please be aware of the legality of your actions.

  • Jellyfin on Ubuntu 22.04: Your Ultimate Media Server Setup Guide

    Jellyfin on Ubuntu 22.04: Your Ultimate Media Server Setup Guide

    Transform your Ubuntu 22.04 into a powerful media server with Jellyfin! This open-source software offers a polished way to organize and stream your media. Here’s a detailed guide on installing and setting up Jellyfin on Ubuntu 22.04.

    Step-by-Step Installation

    1. Adding the GPG Key

    Secure your package downloads by adding Jellyfin’s public GPG key:

    sudo apt install apt-transport-https ca-certificates gnupg2 curl git -ycurl -fsSL https://repo.jellyfin.org/ubuntu/jellyfin_team.gpg.key | sudo gpg --dearmor -o /etc/apt/trusted.gpg.d/jellyfin.gpg

    2. Adding the Jellyfin Repository

    Add the Jellyfin repository to your system:

    echo "deb [arch=$(dpkg --print-architecture)] https://repo.jellyfin.org/$(awk -F'=' '/^ID=/{print $NF}' /etc/os-release) $(awk -F'=' '/^VERSION_CODENAME=/{print $NF}' /etc/os-release) main" | sudo tee /etc/apt/sources.list.d/jellyfin.list

    3. Updating System Repositories

    Update your system’s package list:

    sudo apt update

    4. Installing Jellyfin

    Install Jellyfin:

    sudo apt install jellyfin

    Post-Installation Setup

    5. Starting the Jellyfin Service

    Enable and start Jellyfin’s service:

    sudo systemctl enable jellyfinsudo systemctl start jellyfin

    6. Configuring Firewall

    Ensure Jellyfin’s default port (8096) is open in your firewall:

    sudo ufw allow 8096

    7. Accessing Jellyfin

    Access the Jellyfin web interface via 127.0.0.1:8096 or ip-address:8096 on your browser.

    8. Creating Admin Account

    Set up an admin username and password for Jellyfin.

    9. Adding Media Libraries

    Add media content paths to Jellyfin for streaming.

    10. Logging into Jellyfin

    Use your credentials to log into the Jellyfin server.

    Maintenance and Upgrades

    11. Updating Jellyfin

    Regularly update Jellyfin using:

    sudo apt update && sudo apt upgrade

    12. Uninstalling Jellyfin

    If needed, you can uninstall Jellyfin:

    sudo apt autoremove install jellyfin --purgesudo rm /etc/apt/sources.list.d/jellyfin.list

    Enhancing Your Media Experience

    For more insights on optimizing your media server, check out our article on Jellyfin vs Plex: A Comprehensive Comparison of Media Servers.

    Setting up Jellyfin on Ubuntu 22.04 is straightforward and enhances your media streaming capabilities. Follow this guide for a seamless installation and enjoy a robust, self-hosted media server!

  • NVIDIA on Ubuntu 22.04: The Definitive Installation Guide

    NVIDIA on Ubuntu 22.04: The Definitive Installation Guide

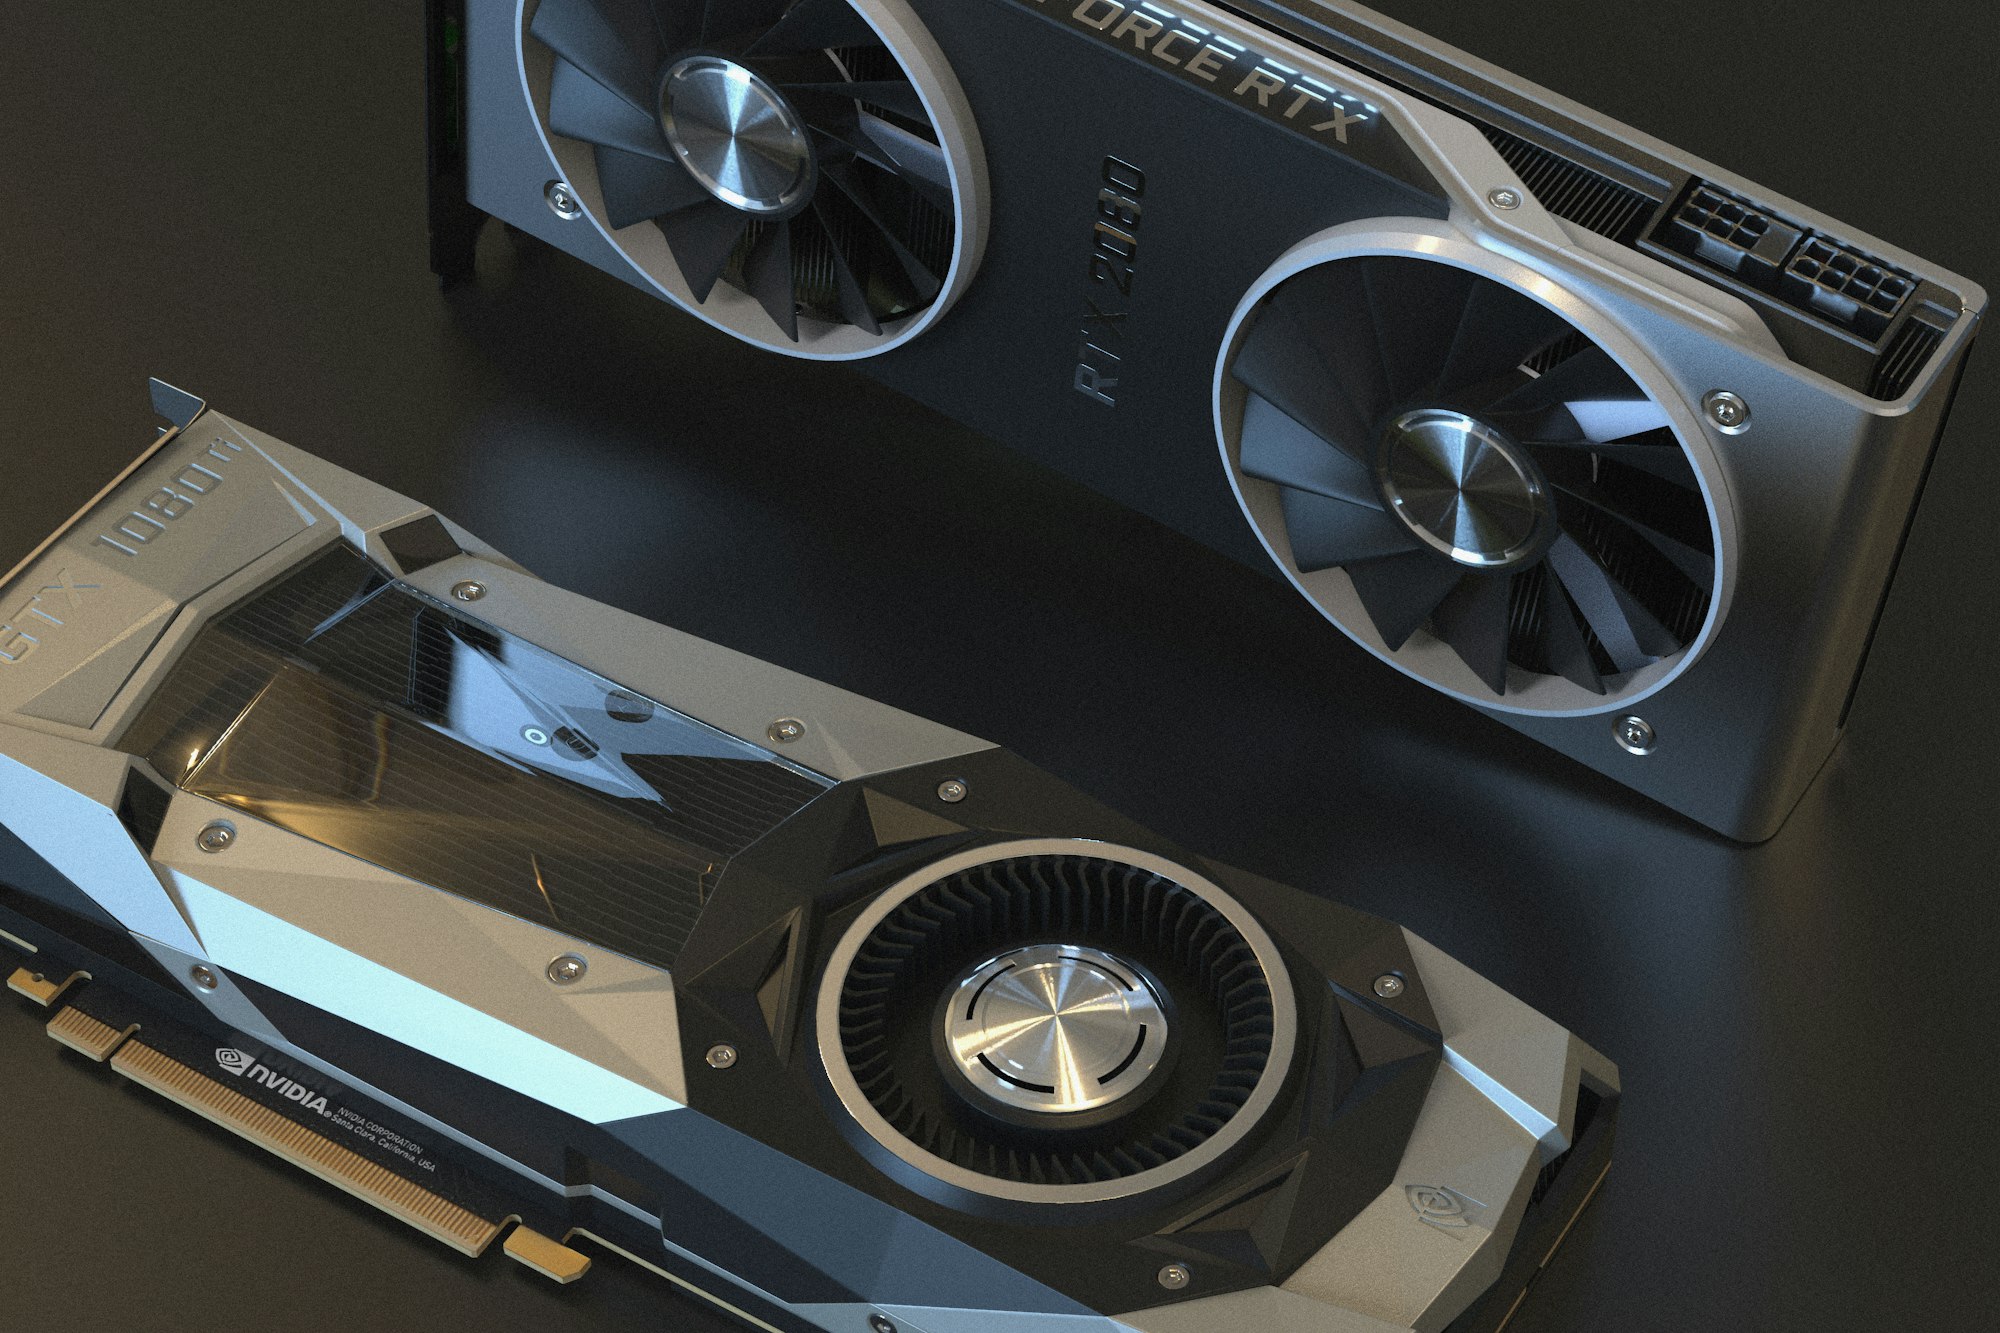
    Are you ready to unleash the full power of your NVIDIA graphics card on Ubuntu 22.04? This comprehensive guide will walk you through various methods to install NVIDIA drivers, ensuring optimal performance and stability for your system.

    Installation from Ubuntu Repository: A Simple Approach

    The Ubuntu repository offers a straightforward way to install NVIDIA drivers. Here’s a detailed walk-through:

    Identifying Your Graphics Card

    Before installing, it’s crucial to know which NVIDIA card you have. This information will help in selecting the appropriate driver. To identify your card:

    • Open the Terminal.
    • Run the command: ubuntu-drivers devices.
    • Note the model and recommended driver from the output.
    a close up of a graphics card on a table
    Photo by Christian Wiediger / Unsplash

    Installing the Driver

    Ubuntu simplifies the driver installation process. You have two options:

    1. Automatic Installation:
      • Run sudo ubuntu-drivers autoinstall.
      • This command automatically installs the driver recommended for your graphics card.
    2. Manual Installation:
      • Install a specific driver with: sudo apt install nvidia-driver-XXX (replace XXX with the driver version number).
      • This method is useful if you need a specific driver version.

    Finalizing Installation

    After installing the driver, a system reboot is necessary to apply changes. Simply run sudo reboot.

    This method is ideal for most users, providing a balance between ease of use and performance​​.

    Advanced Installation: Beta Drivers via PPA Repository

    For those seeking the latest features and updates, the PPA repository offers access to beta drivers. However, note that these drivers might be less stable.

    Adding the PPA Repository

    • Execute sudo add-apt-repository ppa:graphics-drivers/ppa.
    • This command adds the repository to your system, enabling access to the latest drivers.

    Driver Installation

    Follow the same steps as in the standard method, but with access to a wider range of driver versions.

    System Reboot

    As with the previous method, reboot your system to activate the new driver​​.

    Manual Installation: Direct from Nvidia

    For advanced users, manual installation offers the most control.

    Downloading the Official Driver

    • Visit the official Nvidia website.
    • Select and download the appropriate driver for your graphics card.

    Installing Prerequisites

    • Run sudo apt install build-essential libglvnd-dev pkg-config.
    • These packages are necessary for the installation process.

    Disabling Nouveau and Installing the Driver

    • Disable the default Nouveau driver.
    • Switch to runlevel 3 using sudo telinit 3 to stop the current display server.
    • Install the downloaded driver using the command provided on Nvidia’s website.

    Reboot and Configuration

    • After installation, reboot your system.
    • Configure the NVIDIA X Server Settings for optimal performance​​.

    Full potential

    This guide covers everything from simple to advanced methods for installing NVIDIA drivers on Ubuntu 22.04. Whether you’re a casual user or a power user, these instructions will help you maximize your NVIDIA graphics card’s capabilities on Linux.

    Remember, with great power comes great responsibility. Always back up important data before making significant changes to your system.

  • Unzipping to Specific Directories: A Linux User’s Guide

    Hello, fellow Linux enthusiasts! Today, we’re unraveling the mystery of unzipping files to specific directories. Whether you’re a seasoned Linux user or just starting, this guide is your key to mastering the art of file extraction in Linux.

    Why Specify a Directory for Unzipping?

    Unzipping files to a specific directory helps you stay organized and can be crucial for maintaining file structure in many scenarios, such as when installing software, organizing downloads, or managing large datasets.

    The Magic of the unzip Command

    At the heart of our tutorial is the unzip command – a simple yet powerful tool in Linux. Let’s break down how to use it effectively.

    The Basic Unzip Command

    To unzip a file, the basic syntax is:

    unzip file.zip

    This command will extract the contents of file.zip into the current working directory.

    Unzipping to a Specific Directory

    To unzip files into a specific directory, use the -d option followed by the desired directory path. Here’s how it’s done:

    unzip file.zip -d /path/to/directory

    Creating the Directory on the Fly

    What if the directory doesn’t exist? No problem! Combine mkdir and unzip like this:

    mkdir -p /path/to/directory && unzip file.zip -d /path/to/directory

    This command creates the directory (if it doesn’t exist) and then extracts the files into it.

    Advanced Options for Power Users

    • List Contents Without Extracting: unzip -l file.zip
    • Extract Specific Files: unzip file.zip file1.txt file2.txt
    • Overwrite Existing Files Without Prompting: unzip -o file.zip
    • Never Overwrite Existing Files: unzip -n file.zip

    Conclusion

    Unzipping files to a specific directory in Linux is a fundamental skill that enhances your file management efficiency. Armed with the unzip command and its options, you’re now ready to tackle any zipped file with confidence and precision. Happy unzipping!

  • Mastering GParted on Ubuntu: A Step-by-Step Tutorial

    Welcome to the world of Ubuntu, where tweaking and tuning your system is both a necessity and a geeky pleasure! Today, we’re diving into the realm of disk management with GParted, a powerhouse tool for partitioning and handling your hard drives. Whether you’re a Linux newbie or a seasoned penguin, this guide will walk you through installing and using GParted on Ubuntu like a pro.

    Getting Started with GParted

    Before we get our hands dirty, let’s understand what GParted is. GParted, or GNOME Partition Editor, is a free, open-source partition editor that lets you resize, copy, and move partitions without data loss. It’s like having a magic wand for your hard drive, only better because it’s real!

    Why Use GParted?

    • Flexibility: Resize, move, or copy partitions without losing your precious data.
    • Compatibility: Works with a variety of filesystems, including ext4, NTFS, and FAT32.
    • User-Friendly: A graphical interface that makes disk management less intimidating.

    Installing GParted on Ubuntu

    Now, let’s roll up our sleeves and install GParted. It’s as easy as pie – or, in our case, as easy as executing a couple of commands in the terminal.

    1. Open the Terminal: You can do this by searching for ‘Terminal’ in your Ubuntu dashboard or by pressing Ctrl + Alt + T.
    2. Update Package List: Enter the following command to ensure you have the latest package list:

    sudo apt update

    1. Install GParted: Now, for the main event, run:

    sudo apt install gparted

    VoilĂ ! You’ve successfully installed GParted on your Ubuntu system.

    Launching and Using GParted

    With GParted installed, let’s explore how to launch and use this nifty tool.

    1. Launch GParted: Find GParted in your application menu or type sudo gparted in the terminal.
    2. Authenticate: Since disk management requires administrative privileges, enter your password when prompted.
    3. Explore the Interface: GParted’s interface might seem old dated at first, but it’s intuitive. You’ll see your hard drives and their partitions displayed graphically.
    4. Managing Partitions: Right-click on a partition to resize, move, or format it. Remember, always back up your data before making any changes!
    5. Apply Changes: After making your desired changes, click the ‘Apply’ button to execute the tasks.

    Handy Tips and Tricks

    • Backup First: Always back up important data before modifying partitions.
    • Unmount Partitions: Unmount any mounted partitions that you plan to modify.
    • Check for Errors: Use GParted to check for and fix filesystem errors.

    That’s it!

    Congratulations! You’re now equipped to manage your disk partitions with GParted on Ubuntu. Keep in mind, that with great power comes great responsibility, so always be cautious when dealing with disk partitions. Happy partitioning, and may your Ubuntu journey be ever smooth!

  • Minegrub: Minecraft-Inspired Grub Theme

    Step into a world where your Linux boot screen mirrors the blocky aesthetics of Minecraft. The Minegrub theme is not just a GRUB theme; it’s an homage to the Minecraft experience, and this guide will walk you through every step of its installation, and importantly, how to revert if you choose to do so.

    Sourcing the Minegrub Theme

    Before you can install Minegrub, you need to download it. The theme is freely available on GitHub, hosted by the developer’s repository. To start, visit the Minegrub theme’s release page and download the latest version.

    Download Minegrub Theme

    Select the Source code (zip) or Source code (tar.gz) link to download the theme package.

    Installing Minegrub

    With the theme downloaded, it’s time to weave the essence of Minecraft into your machine’s very startup.

    Delving into GRUB’s Configuration

    Navigate to the /etc/default/grub file to begin the installation process, backing up the original settings to safeguard against any missteps.

    # Backup your GRUB configuration for safety
    sudo cp
    /etc/default/grub /etc/default/grub.bak

    # Edit the GRUB configuration to install Minegrub
    sudo nano /etc/default/grub

    Add or modify the GRUB_THEME line to point to the Minegrub theme’s theme.txt file:

    GRUB_THEME="/boot/grub/themes/minegrub-theme/theme.txt"

    Don’t forget to update GRUB to apply the new Minegrub theme settings:

    bashsudo update-grub

    Customizing with GRUB Customizer

    For those who prefer a more visual approach, GRUB Customizer can be a helpful ally, allowing you to install the Minegrub theme with a few clicks.

    # Launch GRUB Customizer
    grub-customizer

    Within the GUI, navigate to the Appearance settings to select the Minegrub theme.

    Uninstalling Minegrub

    If you decide to revert to your previous settings or want to try a new theme, uninstalling Minegrub is straightforward.

    # Remove the Minegrub theme directory
    sudo rm
    -rf /boot/grub/themes/minegrub-theme

    # Revert to your original GRUB settings
    sudo cp
    /etc/default/grub.bak /etc/default/grub

    # Update GRUB to apply the old settings
    sudo update-grub

    In case you used GRUB Customizer, you can also remove the theme through its interface by selecting another theme or the custom settings option.

    Troubleshooting the Minegrub Adventure

    Should the path to customization present challenges, keep these tips handy:

    • Always maintain a backup of your original GRUB configuration.
    • Test the Minegrub theme in a virtual machine before applying it to your main system.
    • If issues arise, consider using GRUB’s rescue mode to troubleshoot and address boot problems.

    Conclusion

    The Minegrub theme offers a playful start to your Linux sessions, invoking the charm of Minecraft every time you power on your machine. With this guide, you’re now equipped to install, customize, and even uninstall Minegrub, ensuring your system’s bootloader is as unique as your in-game creations.

  • Install Debian Testing – Tutorial for beginners

    In today’s article, we’ll take a look at how to install Debian and enable testing repositories, to be able to use more recent and up-to-date versions of software. It is highly suitable for desktop computers. Debian testing is clean, fast, and also (even if the name tells something else) an extremely stable distro – it’s my daily driver on my desktop. It doesn’t mean Debian Stable is bad, but its use case is somewhere else. On the server for example.

    I’ll try to make this article go as deep as possible, but not boring at the same time. So we’ll see if I can make it work and live up to the word. Let’s begin!

    Before We start

    There are a couple of things we need before we proceed to the installation itself. I’ve prepared a list for you:

    • First, you’ll need a PC or virtual machine, we won’t take a step without it.
    • Download Debian 11 ISO, personally, I prefer the netinst – it’s small, you can choose what packages to install, and most things are downloaded during installation.
    • USB Stick (or CD/DVD, but who uses it these days?)
    • Internet connection 
    • Patience
    • Basic computer usage skills

    Once you have all of the above, you can consider yourself as prepared and start the installation process.

    Installation of Debian 12

    Before we can switch to Debian Testing, we have to install Debian Stable first and then do an upgrade. Yes, there are daily builds, but we’ll go the hard way. Don’t worry, it may sound complicated, but it’s simple as fu*k. So, if you’re ready, take your USB stick and put it into the proper hole on the back side of your computer (yes, I mean the USB port, preferably USB 3.0). Your Linux journey starts right here!

    Preparation of USB Pendrive

    It’s time to burn the ISO into the USB drive. There are plenty of software options that can do this for you, but for the purposes of this tutorial, we’ll go with Etcher. It’s simple, open source, and well-designed and it’s available for every possible platform. With Etcher I mustn’t prepare two paragraphs of text for Linux and for Windows separately, just download it and run or install it (depending on the platform you’re using).

    Etcher – tool for burning ISO to USB drive

    After you run Etcher, you’ll get a window with really simple options. Choose “Flash from file” and select Debian ISO you downloaded earlier. Then select your USB drive using the “Select target” option. Finally, click the “Flash!” option and wait until the software finishes the flashing process. 

    Starting the installation of Debian Testing

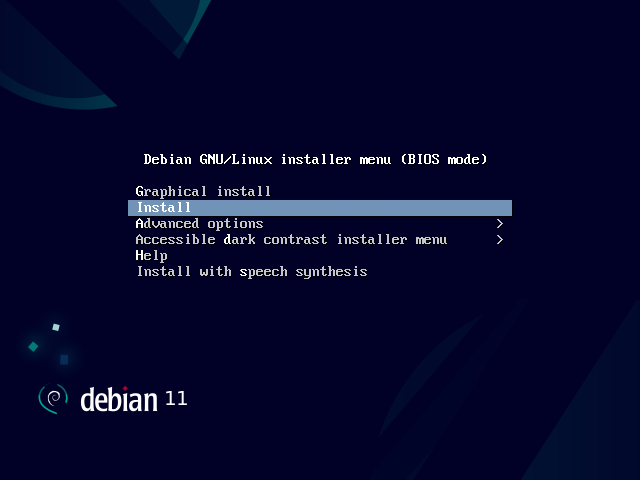
    Now, restart the computer and while it is posting enter the boot menu (in most cases it’s the F12 key, but may vary depending on your PC / laptop manufacturer). Select the drive you’ve flashed the ISO on and boot. Instead of booting into the installed operating system, your computer will boot into GRUB (bootloader) on your USB drive and a few options will be shown. Don’t think about it much and select “Install” (not “graphical install – this is for babies).

    Debian testing installation begins
    Grub boot menu

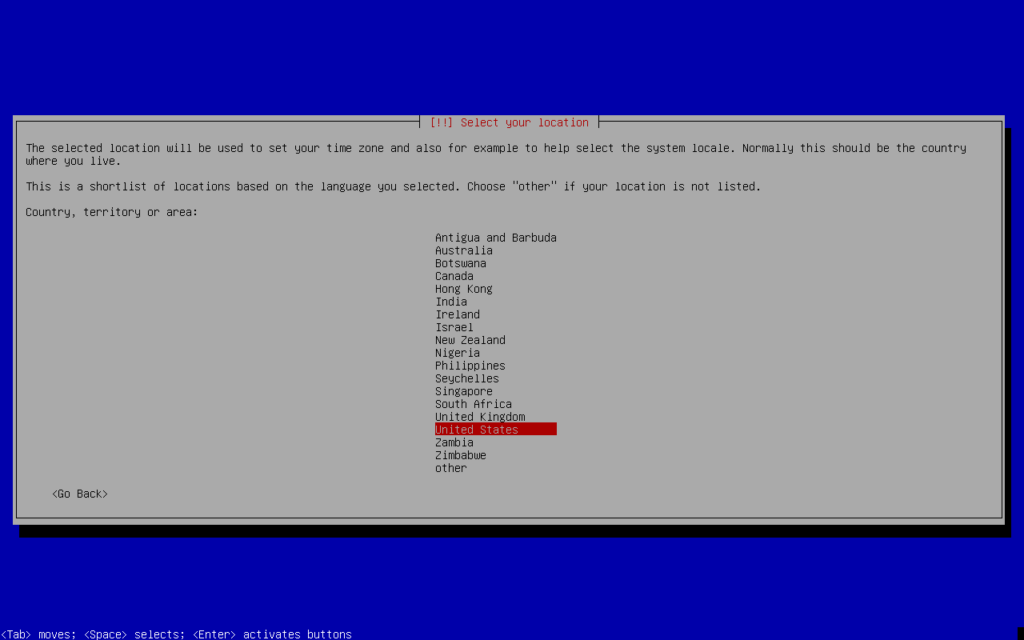
    You’ll be pleased with a nice blue screen (not like the one in Windows) with even more options than before. First, you’ll be asked to select the language, the keyboard layout you want to use, and the country you’re living in or you want to download packages from.

    Country selection
    Debian installation – Country selection

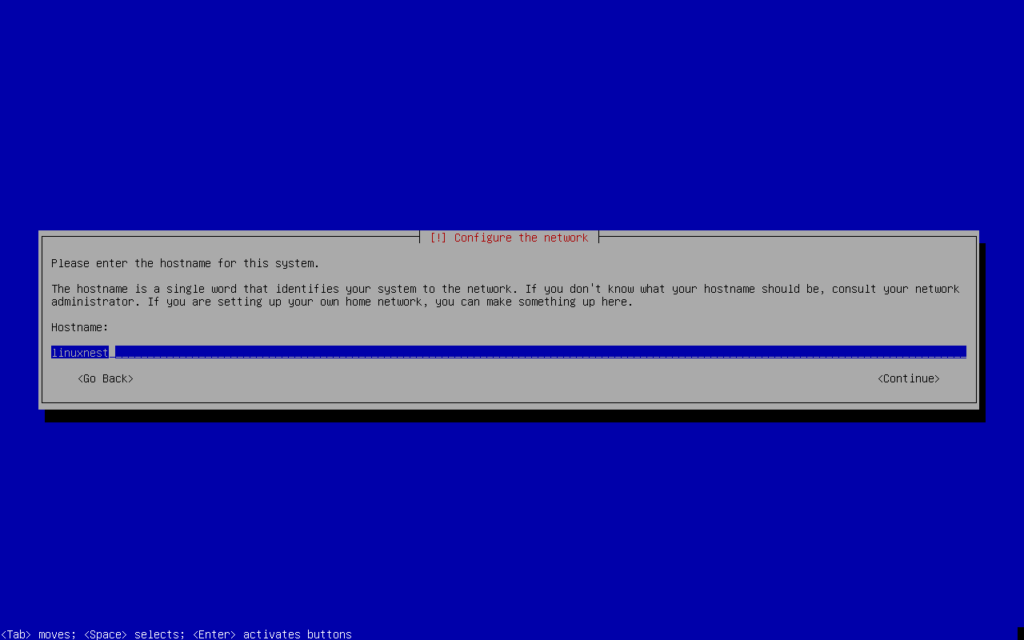
    The installer will now check for data on installation media and try to set up a network with DHCP. This should work without any hassle if you are connected to your home network and have a compatible network card. The next part of network configuration is setting up the hostname. Again, in a home environment, it can be whatever you want. I’ll use linuxnest, because it’s a great name. For the domain name, I’ll leave the field empty, the reason is I have no domain set in my home network.

    Hostname of our new debian testing system
    Debian installation – Choosing Hostname

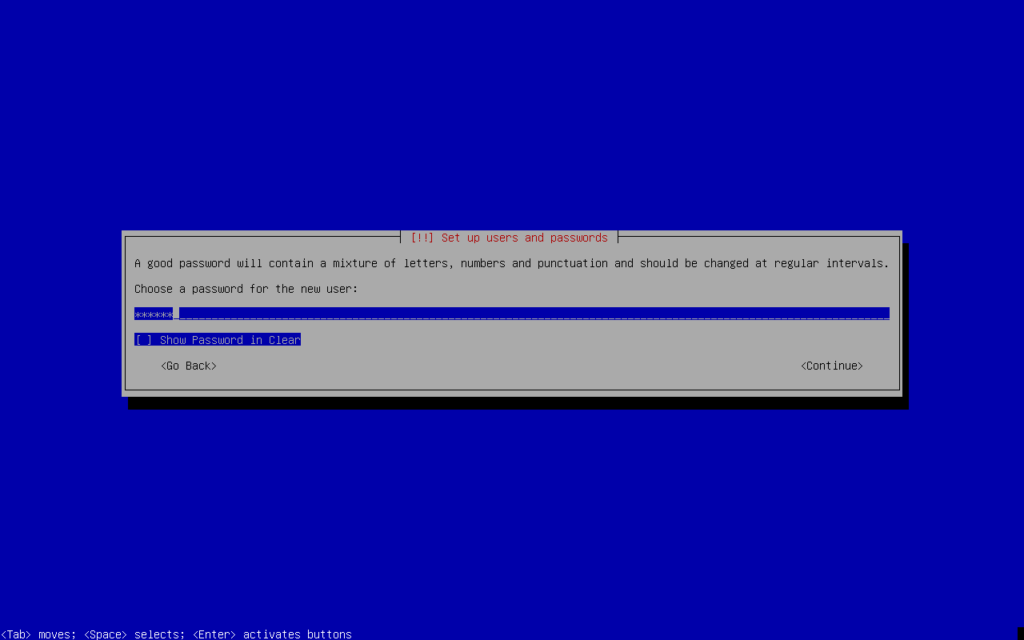
    Now the funny part is coming. We’ll set up a new user. The installer will ask you for the Root password, but leave it empty. If you don’t fill in the root password, the user created in the next step will be added to the sudo group and get administrative privileges. For a username and real name I’ll once more time use linuxnest (you can use your name, but feel free to use mine), fill in the password, and continue the installation process by selecting the time zone you are living in.

    Debian installation – Choosing password for new user

    The Debian installer is a really curious creature and doesn’t want to stop asking questions. The next thing he’ll want to know is which disk partition method you wish to use. Sure, as advanced users you know what’s best for you, the rest of us just use the first option (Guided – use the entire disk). There will be more questions, but the process is really simple.

    Debian installation - Drive selection
    Drive Selection

    Once you’ll get through disk partitioning the base system will be installed. So, let’s get some coffee in the meantime. And no, we don’t want to scan more media if the installer asks (and he will).

    Select Debian archive mirror country – you should be looking for the closest mirror to your location. I’ll choose the United States and deb.debian.org. Disclaimer: We don’t need to use an HTTP proxy… And we don’t want to participate in the package survey…

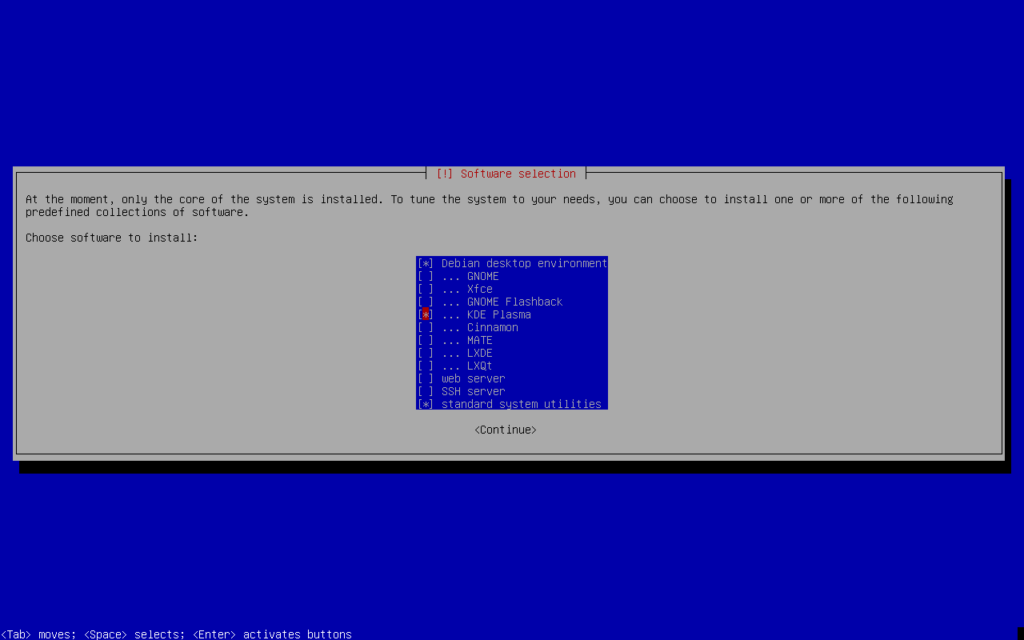
    After these few questions selection of software you want to install finally comes in:

    Debian installation - Software selection
    Debian installation – Software selection

    I am recommending the installation of the Debian desktop environment, KDE Plasma (if you have different preferences, do not hesitate to change your choice), and standard system utilities. Click on the continue button and wait until the installation of all packages comes to an end. This will take a while, especially in case you have a slow internet connection. It’s late for coffee, going for a beer.

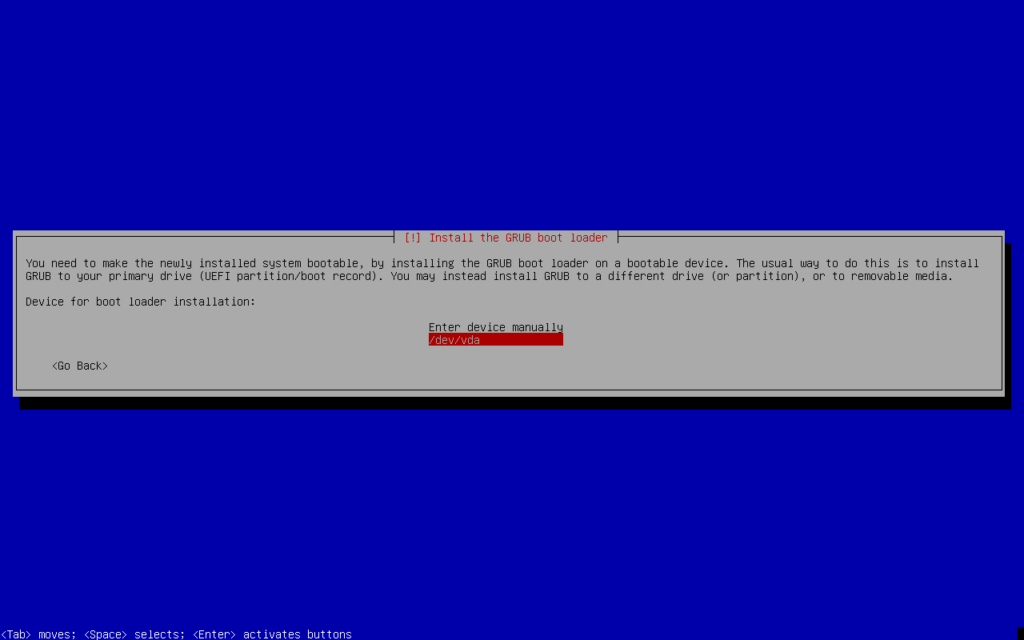
    The final step is to install the GRUB bootloader. Sounds extremely advanced, right? It is! Once you’re asked if you wish to install it to the primary drive, just choose Yes and hit enter. Next, choose a device for bootloader installation. In case you have only one, there will be only one option. Choose the right disk and… loading… downloading… Installer defeated, You Win! Hit the continue button and feel the feeling of success before it all crashes during boot. Just joking, you’ll probably be fine if you haven’t been running Windows on your machine for more than a few months.

    After the installation of Debian is (almost) done

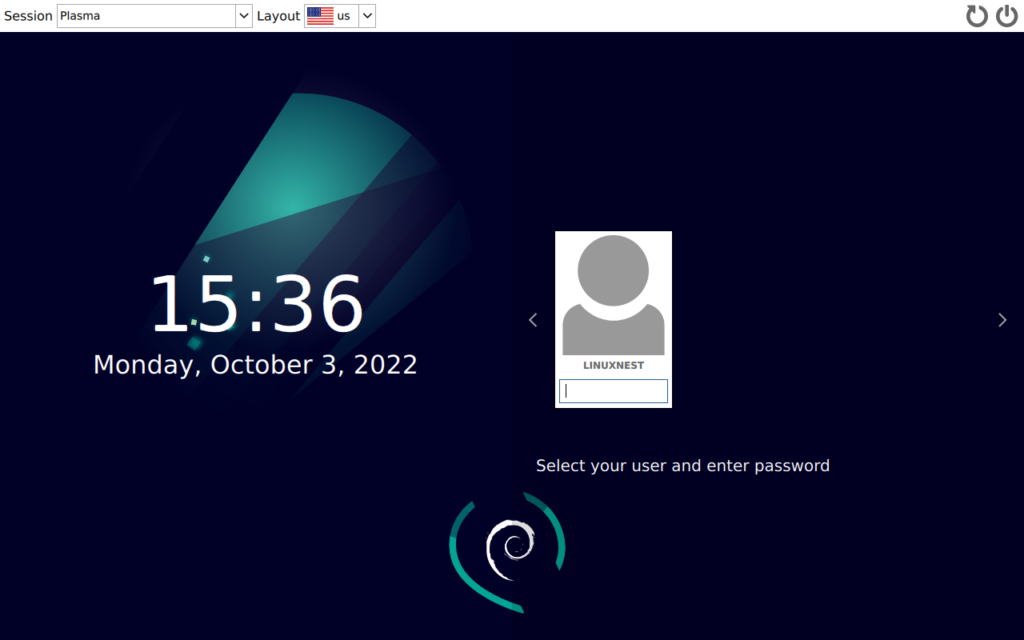
    Debian 11 – default login screen

    Thanks to the fact we installed everything from the network, there is no need to update our packages. Debian 11 is up to date, but at the beginning of this blog post, I was talking about Debian Testing, right? Ok, I promise, I’ll deliver. Log in, click on the menu fire up the Konsole (if you can’t find it, use the search function), and type in:

    sudo nano /etc/apt/sources.list

    In short, sources.list is a file that tells apt package manager where to look for packages. Simply change all bullseyes to testing and close the file (CTRL+X).

    Next, make the upgrade:

    sudo apt update && apt upgrade

    Congratulations, you’re now running Debian Testing. Use it wisely, great power comes with great responsibility! 

    Did you know that you can also play games on Debian using Steam?

  • Turning on Linux on Your School Chromebook: A Step-by-Step Guide

    Turning on Linux on Your School Chromebook: A Step-by-Step Guide

    As the world of computers continues to expand, many users are looking to experiment with different operating systems. Of the many choices available, Linux has emerged as a popular option for its flexibility, speed, and open-source nature, especially among students who want to learn more about computer systems.

    However, turning on or installing Linux on a school Chromebook might seem to be a daunting task for many. This guide will introduce you to the process of how to turn on Linux on your school Chromebook, ensuring you can easily and quickly access it.

    Why Turn on Linux on a School Chromebook?

    Firstly, let’s understand why you might want to turn on Linux on your school Chromebook. Linux offers a window to a whole new world of software, especially the open-source variety. Linux users have access to a plethora of programming tools, editors, and IDEs that are not available on a standard Chromebook operating system. Using Linux, you can also run software that’s not yet available on Chrome OS, explore different programming and command-line environments, or even play games that are only available on Linux.

    Compatibility Check: Can Linux Be Turned on Your School Chromebook?

    Before we delve into the ‘how’, it’s essential to check whether your school Chromebook can support Linux. Chromebooks built in 2019 or later generally have the Linux (Beta) feature already built-in. You can check this by going to your Chromebook ‘Settings’ and looking for the ‘Linux (Beta)’ option in the menu on the left.

    Steps to Turn on Linux on Your School Chromebook

    Below are the step-by-step instructions to turn on Linux on your Chromebook.

    Step 1: Click on the Quick Settings Panel at the bottom right of your screen.

    Step 2: You’ll find the ‘Settings’ icon, click on it to open the settings page.

    Step 3: On the settings page, located on the left part of the screen is a menu. Scroll down and find ‘Linux (Beta)’, and click on it.

    Step 4: You will see a ‘Turn On’ button next to Linux (Beta), click on it.

    Step 5: After clicking, a new window will pop up with the option to ‘Install’. Click on ‘Install’, and the Chromebook will start the process of setting up the Linux container.

    Step 6: Wait as Chromebook does its thing. Once it finishes installing, a terminal window will appear, and voila! You have activated Linux on your Chromebook.

    Note: If you encounter any issues during the installation process, it’s always a safe bet to restart your Chromebook and give it another go.

    Post-Activation Steps

    Once you have successfully turned on Linux, you can start to explore. A good place to start is the terminal. The terminal is your gateway to every advanced operation on Linux. You can install software, manipulate files, monitor system resources, and much more, all by typing commands.

    Conclusion

    Turning on Linux on your school Chromebook allows you to unlock several enhanced capabilities that the traditional Chrome OS does not provide. Whether you are a student exploring coding, someone who needs access to tools unavailable on Chrome OS, or even a gamer, Linux provides a flexible and powerful platform. By following the steps outlined in this guide, you can learn how to turn on Linux on your school Chromebook with ease and minimal effort. Happy exploring!

  • How to Run Linux on Nintendo Switch

    How to Run Linux on Nintendo Switch

    Have you ever looked at your Nintendo Switch and thought, “I wish I could run Linux on this!” If you have, then this article is for you.

    In recent years, the Nintendo Switch has emerged as a powerful and versatile piece of hardware capable of more than just gaming. One such capability is running the popular open-source OS known as Linux. This post will guide you on how to run Linux on your Nintendo Switch.

    Preparing Your Console

    The first step for installing Linux on Switch is to ensure your device is suitable for the task. Compatibility is often determined by the device’s hardware rather than the software.

    Note: Running Linux on your Nintendo Switch can risk bricking your device if not done correctly. Proceed with caution, and understand that it may void your warranty.

    How to determine if my console is hackable

    Basically, all versions available on the market are hackable. If you want to go the easy way, you’d be looking for an unpatched version (you can check whether your Switch is patched or not by checking your serial number using this website).

    In case your console is patched, the only way to “hack” your Switch is by using a modchip (for example PicoFly). This process demands advanced soldering skills, so it is definitely not for everyone.

    Choosing The Right Payload

    You’ll need a payload to boot Linux on your Switch. A common choice for this task is the Fusee Gelee payload. It’s a trusted exploit compatible with most Switch devices and actively maintained by the community.

    git clone https://github.com/Qyriad/fusee-launcher.git

    cd fusee-launcher

    python3 setup.py install

    Transfer the payload to your Switch and run it to start the Linux installation.

    Choosing The Linux Distribution

    There are various Linux distributions available for the Nintendo Switch. A widely popular option is Switchroot LineageOS, an Android distribution based on Linux kernel that provides a user-friendly interface and wide compatibility with Switch hardware.

    Download the latest Switchroot LineageOS image available and write it to your Switch’s microSD card.

    Booting Into Linux

    To boot your Nintendo Switch into Linux, hold the volume up button while switching on your device. The payload you transferred should then boot into your chosen Linux distribution.

    The transformation only happens when you boot up. When you turn off your console and restart normally, it will still be a Nintendo Switch.

    Playing Safe With Nintendo Switch Linux

    While running Nintendo Switch Linux can offer exciting possibilities, there are a few risks worth noting:

    • Running Linux on a Switch could potentially void its warranty
    • There’s always a risk of ‘bricking’ the console, rendering it unusable
    • Nintendo may also ban hacked consoles from online gameplay.

    A World Of Possibilities Awaits

    Once you’ve successfully installed Linux on your Nintendo Switch, you’ll have transformed your portable gaming device into a fully-fledged computer system.

    Running Linux on a Nintendo Switch may seem like a daunting task, but the rewards make it truly worthwhile for those seeking to expand the capabilities of their console. Explore new horizons with your Nintendo Switch and the power of Linux- happy computing.

  • How to use PS3 Controller on Linux: A Comprehensive Guide

    How to use PS3 Controller on Linux: A Comprehensive Guide

    If you’re a video game lover and a Linux user, you’ve likely wondered at least once how to use a PS3 controller on your Linux system. Well, we’ve got good news for you. This guide will walk through, in great detail, how you can use your PS3 controller on Linux and make your gaming experience all the more enjoyable.

    After reading this article, using a PS3 controller on a Linux-based computer will no longer be a daunting task. We’ll guide you every step of the way, making the experience simple and convenient.

    Why Use a PS3 Controller on Linux?

    Does the idea of using a keyboard and mouse to play your beloved video games feel odd? Or perhaps you just want to feel the vibration from an intense car chase in your hands? A PlayStation 3 (PS3) controller can be an impressive option for gamers looking to have a richer and more interactive gaming experience on Linux.

    Getting Started: Connect the PS3 controller to Your Linux Machine

    The initial step to ‘ps3 controller on linux’ is getting your controller connected to your device.

    Wired Connection

    The fastest way to connect your PS3 controller to your Linux machine is by good old wired USB connection. Here’s how you do it:

    1. Plug in your PS3 controller into a USB port on your Linux system. Your computer will automatically detect it as a new device.

    2. Install the joystick utility package. This step might necessitate your Linux device’s terminal. The joystick package is a set of libraries that will allow your Linux system to interact with the controller.

    Here’s a quick command to install this utility package:

    sudo apt-get install joystick

    Once you’ve completed these steps, your PS3 controller should work flawlessly on your Linux system.

    Wireless Connection – Bluetooth

    If you want a clutter-free gaming zone and prefer going wireless, connecting your PS3 controller via Bluetooth is your best bet. Follow these steps:

    1. Disable your system’s Bluetooth. You’ll come to understand why soon enough!

    2. Install the required packages. You’ll need the ‘sixpair’ and ‘sixaxis’ packages, which you can install with the command below:

    sudo apt-get install sixpair sixaxis

    1. Pair your PS3 controller. You’ll need to use the ‘sixpair’ command to pair your PS3 controller with your Linux machine successfully.

    2. Enable your system’s Bluetooth and connect! You’re now all set for a wireless gaming experience.

    Conclusion

    Can you feel the breathtaking car chase vibrations in your hands yet? We’re confident that after reading this article, ‘ps3 controller on linux’ is no longer a mystery. Whether you choose to go wired or wireless, gaming on your Linux system with a PS3 controller is sure to take your experience a notch higher. Now go ahead, fire up your favourite game, and dive in – happy gaming!