Author: martin

  • Choosing the Best Printer for Linux: Unveiling The Best New Printer Models

    Choosing the Best Printer for Linux: Unveiling The Best New Printer Models

    Who doesn’t love the versatility and open-source nature of Linux? Being an ardent Linux fan myself, I can’t deny the struggle that comes when trying to find the best printer for Linux. The options can sometimes seem limited or too complex. The good news? I’ve come across a few outstanding new printer models that are absolutely compatible with Linux. So, let’s dive in!

    The Need for a Linux-Compatible Printer

    When it comes to finding the right printer, you’ll want to choose a model that not only performs well but is fully compatible with your Linux operating system. The ideal printer should provide stress-free installation, high-quality outputs, and cost-effective operations with your Linux-powered machine.

    What Makes a Printer Linux-Compatible?

    A Linux-compatible printer takes into account the unique configuration and setup of Linux Desktops and Servers. This means that the drivers necessary to operate the printer can easily integrate with the full range of Linux distributions available. These distributions can vary from Ubuntu, Fedora, to the ever-popular Mint.

    The Quest for the Best Printer for Linux

    Finding the right printer isn’t always a walk in the park, but it shouldn’t be an uphill climb either. Here, we will discuss my top picks for Linux-compatible printers that combine ease of use, exceptional quality, cost-effectiveness, and of course, unparalleled Linux compatibility.

    1. HP OfficeJet Pro 9015

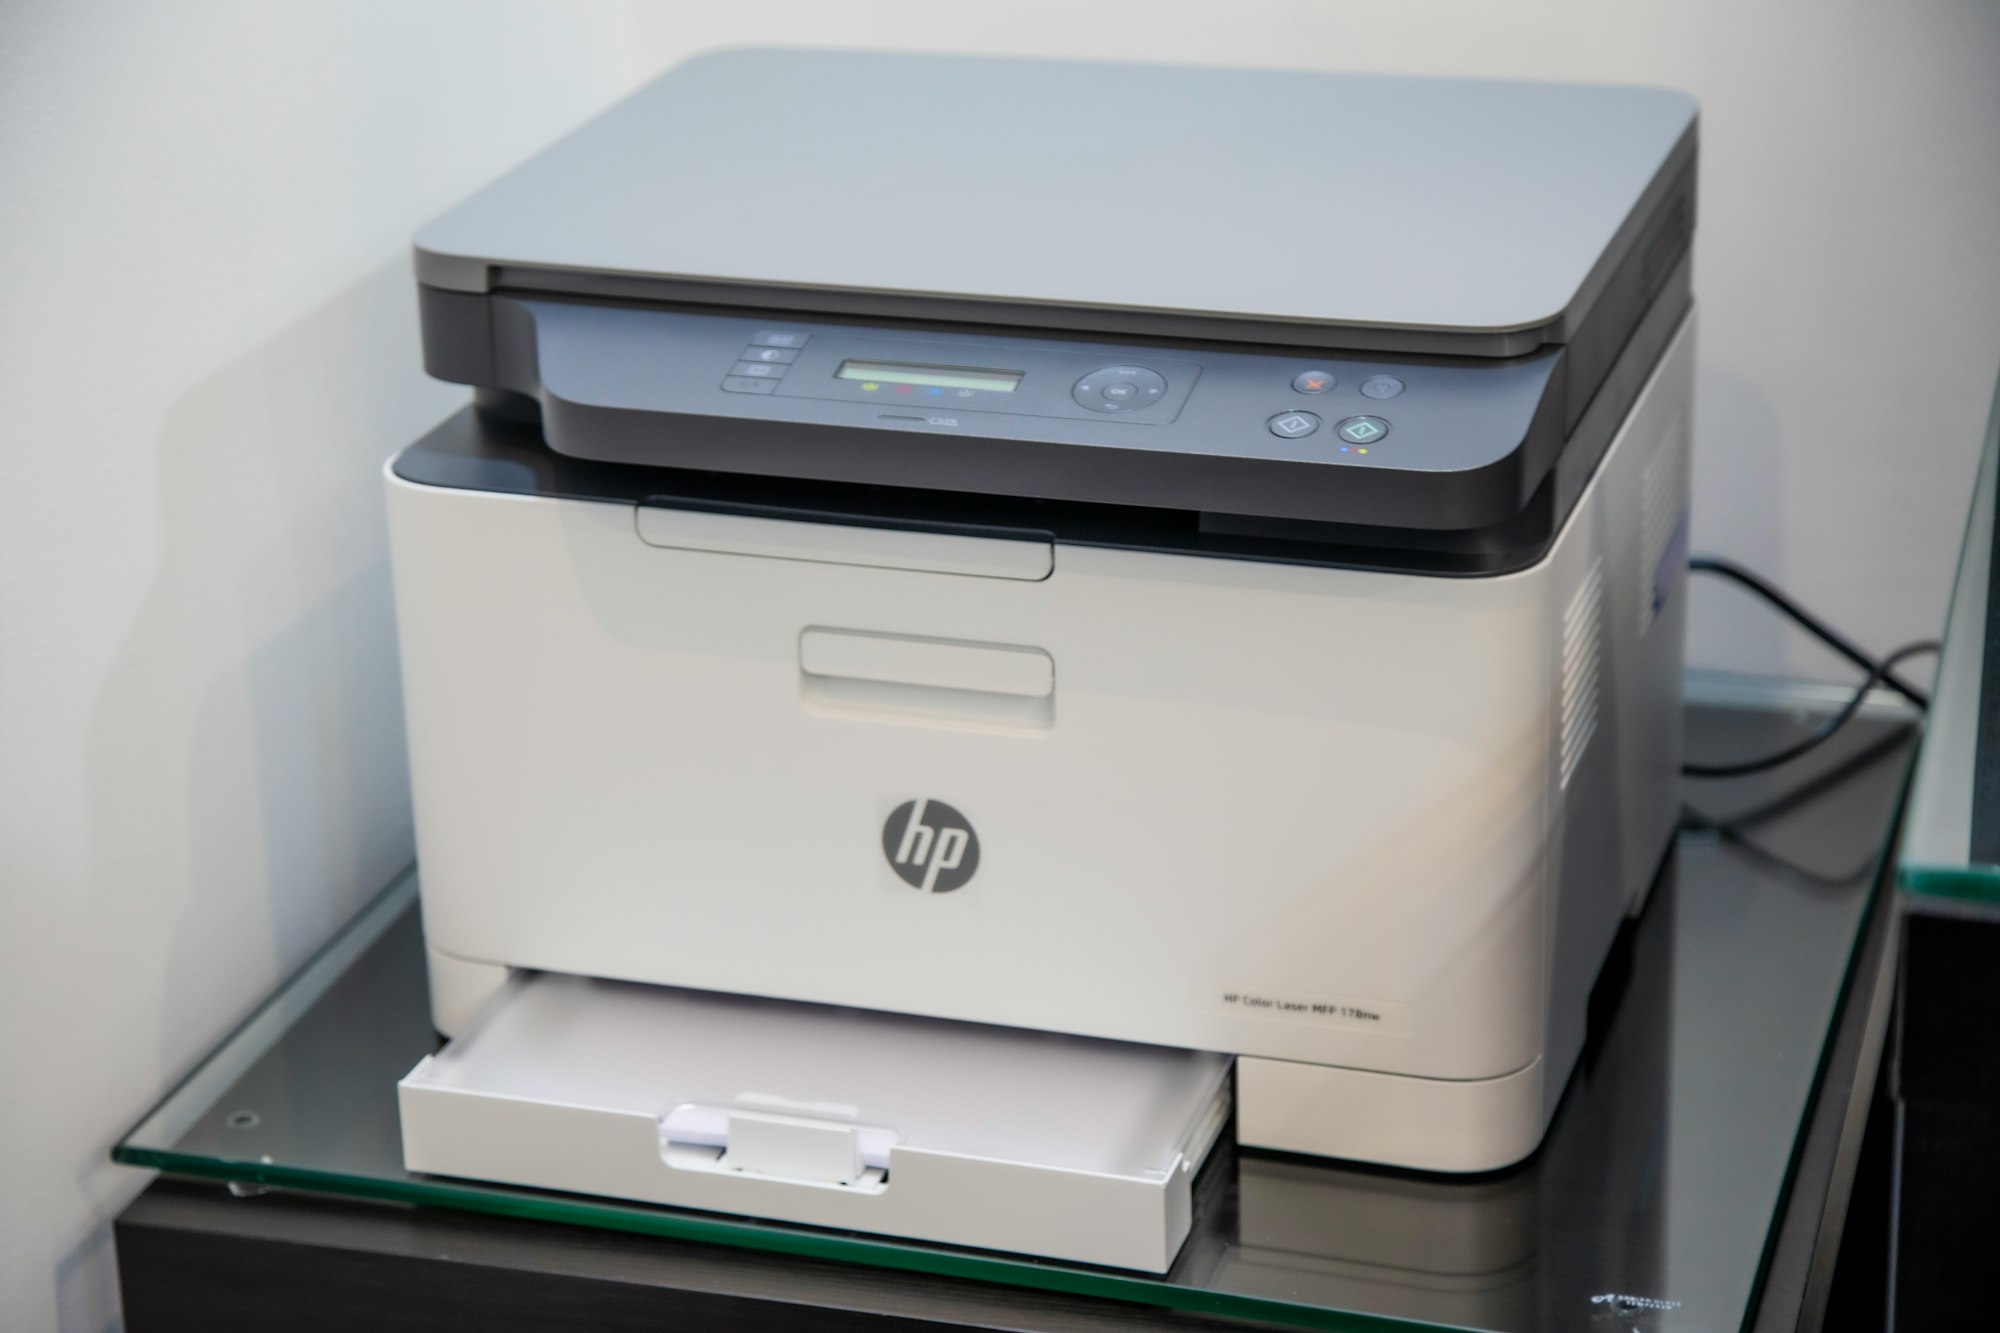
    When it comes to printers, HP is a household name, and the OfficeJet Pro 9015 is no exception. Its Linux compatibility is quite impressive, supporting a variety of distributions with ease. It boasts excellent print quality and a host of advanced features you would expect from a top of the line printer.

    Pros:

    • Excellent print quality
    • Robust build and sleek design
    • Reliable wireless printing
    • Supports duplex printing

    Cons:

    • The ink can be a bit expensive
    • Might take some time to setup

    2. Brother HL-L8360CDW

    The Brother HL-L8360CDW has a reputation for being one of the best Linux-compatible printers around. With its seamless compatibility with various Linux distributions, the printer allows users to produce top-quality prints without any hassle.

    Pros:

    • High print quality: the best for your office-related tasks.
    • Quick and easy setup: just plug and play!
    • Automatic duplexing: make use of both sides of the paper.
    • A large touchscreen for easy operation.

    Cons:

    • The size is relatively large.
    • Replacing cartridges may hit your pocket.

    Final Thoughts

    Linux compatibility should be a top consideration when choosing your next printer. While the best printer for Linux might vary based on personal choices, the HP OfficeJet Pro 9015 and Brother HL-L8360CDW are outstanding options to consider. They seamlessly connect with Linux operating systems, paving the way for convenient and efficient printing.

    Choosing the right printer can seem daunting, but with thorough research and attention to detail, you can find a printer that not only meets your needs but exceeds them while being Linux-compatible.

    Remember, in the world of open-source computing, the sky’s the limit!

  • The Best Linux Distro for Laptops – Which One to Choose?

    The Best Linux Distro for Laptops – Which One to Choose?

    Choosing the best linux distro for laptops is an important decision. Not only because it can impact your hardware’s performance, but it can also affect your overall working or gaming experience. With a plethora of Linux distributions available, we are often left wondering: which one is the best?

    Understanding Linux and Its Distros

    Before we dive into evaluating the best linux distro for laptops, let’s arm ourselves with some relevant knowledge. Linux, in simple terms, is an open-source operating system. Think of it similar to Windows or macOS. However, one distinguishing feature is that Linux gives users the privilege to modify and distribute their own versions of the OS. These versions are what we call ‘Linux Distros’.

    Best Linux Distro for Laptops: Our Top Picks

    Now that we have a basic idea about Linux, let’s delve into our primary discussion: the best linux distro for laptops. Below, we have lined up some of our top picks, taking into account factors like user-friendliness, resource utilization, updates, and software availability.

    Ubuntu: The All Rounder

    Arguably the most popular Linux distro, Ubuntu is known for its accessibility and abundant user resources. A strong community support, coupled with a stable environment, makes Ubuntu, a top-notch choice for both beginners and veterans. Regular updates and an extensive software library give it an extra edge.

    Fedora: The Innovative Choice

    Fedora moves along with the latest technology trends. If you are a tech enthusiast who craves the newest features, Fedora can be your go-to choice. However, its rapid development cycle may introduce occasional stability issues.

    Linux Mint: The User-friendly Distro

    Linux Mint’s Cinnamon variant is an ideal choice for those new to the Linux world. Its interface is simple and intuitive, which minimizes the learning curve. Linux Mint offers strong multimedia support and compatibility, making it a particularly good choice for home users.

    Which one to Choose?

    All distros discussed above have their own strengths, and the best linux distro for laptops ultimately boils down to your individual needs. Ask yourself: What will you primarily use your laptop for? What is your level of tech expertise? Answering these questions will guide you to the distro that best fits your needs.

    Final Words

    While we have given our top picks on what we believe are the best linux distros for laptops, it’s worth mentioning that Linux’s beauty lies in its vast variety. With hundreds of distros available, you have the freedom to explore and find the one that fits your specific preferences.

    Hopefully, this article has given you a clearer picture of the Linux landscape. Remember, the journey to finding your best linux distro for laptops is all about trial, discovery, and learning. So, dive in, explore, and live the Linux experience.

  • How to use PS3 Controller on Linux: A Comprehensive Guide

    How to use PS3 Controller on Linux: A Comprehensive Guide

    If you’re a video game lover and a Linux user, you’ve likely wondered at least once how to use a PS3 controller on your Linux system. Well, we’ve got good news for you. This guide will walk through, in great detail, how you can use your PS3 controller on Linux and make your gaming experience all the more enjoyable.

    After reading this article, using a PS3 controller on a Linux-based computer will no longer be a daunting task. We’ll guide you every step of the way, making the experience simple and convenient.

    Why Use a PS3 Controller on Linux?

    Does the idea of using a keyboard and mouse to play your beloved video games feel odd? Or perhaps you just want to feel the vibration from an intense car chase in your hands? A PlayStation 3 (PS3) controller can be an impressive option for gamers looking to have a richer and more interactive gaming experience on Linux.

    Getting Started: Connect the PS3 controller to Your Linux Machine

    The initial step to ‘ps3 controller on linux’ is getting your controller connected to your device.

    Wired Connection

    The fastest way to connect your PS3 controller to your Linux machine is by good old wired USB connection. Here’s how you do it:

    1. Plug in your PS3 controller into a USB port on your Linux system. Your computer will automatically detect it as a new device.

    2. Install the joystick utility package. This step might necessitate your Linux device’s terminal. The joystick package is a set of libraries that will allow your Linux system to interact with the controller.

    Here’s a quick command to install this utility package:

    sudo apt-get install joystick

    Once you’ve completed these steps, your PS3 controller should work flawlessly on your Linux system.

    Wireless Connection – Bluetooth

    If you want a clutter-free gaming zone and prefer going wireless, connecting your PS3 controller via Bluetooth is your best bet. Follow these steps:

    1. Disable your system’s Bluetooth. You’ll come to understand why soon enough!

    2. Install the required packages. You’ll need the ‘sixpair’ and ‘sixaxis’ packages, which you can install with the command below:

    sudo apt-get install sixpair sixaxis

    1. Pair your PS3 controller. You’ll need to use the ‘sixpair’ command to pair your PS3 controller with your Linux machine successfully.

    2. Enable your system’s Bluetooth and connect! You’re now all set for a wireless gaming experience.

    Conclusion

    Can you feel the breathtaking car chase vibrations in your hands yet? We’re confident that after reading this article, ‘ps3 controller on linux’ is no longer a mystery. Whether you choose to go wired or wireless, gaming on your Linux system with a PS3 controller is sure to take your experience a notch higher. Now go ahead, fire up your favourite game, and dive in – happy gaming!

  • Best Debian 11 Firewall: Analysis of Popular Firewall Solutions for Debian

    Best Debian 11 Firewall: Analysis of Popular Firewall Solutions for Debian

    Firewalls are an integral component of securing any computer system. In the world of Linux Debian, firewalls add another layer of protection, safeguarding the system against unauthorized access. In this article, we’ll be looking at the best debian 11 firewall solutions, and how they compare to one another.

    An Introduction to Debian 11 Firewall

    Debian 11, also known as ‘Bullseye,’ offers robust security features. A standout amongst these is the debian iptables firewall. This iptables tool is used for setting up, maintaining, and inspecting tables of IP packet filter rules. When used properly, it can significantly reinforce the security posture of your Debian system.

    However, iptables isn’t the only solution available. Other firewalls have shown promising results when used with Debian. Let’s analyze some of the most popular ones.

    IPTables: The Default Debian Firewall

    iptables remains the default firewall option for Debian. It benefits from being directly integrated into the Linux kernel, boasting considerable power and flexibility. The practicality of iptables is vast; it can handle complex tasks such as stateful inspections, packet filtering, and network address translations.

    However, iptables does come with a steep learning curve for beginners. Its syntax is often viewed as complex, and understanding this can take time and patience.

    UFW: An Easy-to-Use Firewall

    UFW, short for ‘Uncomplicated Firewall,’ delivers on its promise of simplicity. Development with an explicit goal to ease iptables firewall configuration, UFW provides a user-friendly way to create an IPv4 or IPv6 host-based firewall.

    UFW has an intuitive syntax, a stark contrast to iptables, making it a worthy adversary for the title of the best debian 11 firewall. The simplicity does come with a caveat; it may not offer the advanced features prevalent in iptables.

    Firewalld: Dynamic Firewall Management

    Firewalld offers another approach to firewall solutions. This solution provides a dynamically managed firewall allowing modification without the need to restart policies or connections.

    Firewalld is characterized by its support for network/firewall zones to define the trust level of network connections or interfaces. It stands out with its GUI, FirewallD, which makes it attractive for users who prefer graphical interfaces over command-line interactions.

    nftables: The New Kid on The Block

    Nftables is a project that aims to replace the existing iptables, ip6tables, arptables, and ebtables frameworks. nftables reuses most concepts used in Netfilter while providing a simplified and more flexible configuration.

    With Debian Bullseye, nftables is set to become the default framework. It offers better performance with complex rulesets, has a simpler syntax, and can unify all the various packet filtering tasks into one tool.

    Where To Next?

    Choosing the right debian 11 firewall boils down to your needs and skills. For beginners, UFW might seem instrumental with its easy-to-understand structure. Iptables, despite its complexity, shines when deploying complex firewalls and remains a stable choice.

    The advent of nftables signals a shift for the future of Debian firewalls. Its simplified syntax and universal application make it a promising contender. However, Firewalld, with its intuitive GUI and dynamic rule management, shouldn’t be underestimated.

    Remember, at the end of the day, a firewall is as good as the policies defined within it. Make sure you understand the principles of good firewall policy design, regardless of the firewall you choose. It is essential to regularly review and maintain these policies to adapt to new security threats. Whichever firewall solution you select, ensure it suits your specific security strategy!

  • Insight into Linux Projects for Beginners

    Insight into Linux Projects for Beginners

    Linux is a comprehensive open-source operating system, more like a software ecosystem encompassing a myriad of application possibilities. As a beginner, the realization of the enormity of Linux can be daunting; however, some well-chosen and focused Linux projects for beginners can ease that burden. Let’s explore this fascinating world together!

    Essential Linux Projects for Newbies

    Set Up A Web Server

    One of the best projects to start your Linux journey is building your own web server. This is how the internet works – through these servers. By setting up your own web server on Linux, not just do you understand the ins and outs of how the web works, but you also gain valuable experience in handling Linux servers, useful in numerous professional contexts.

    Make Your Own Shell Script

    Shell scripting is almost a rite of passage for every Linux enthusiast. Scripts are not as mythical as they seem. With foundational knowledge of a few commands, you can write simple scripts to automate several Linux tasks. A scripting project can be an excellent stepping stone to delve deeper into Linux’s capabilities.

    Explore Open Source Software

    Linux is synonymous with open source. The possibilities of Open Source Software (OSS) are endless and so are the learning experiences. It helps to immerse you in the community-centric development of Linux and gives a comprehensive grip on how Linux operates under the hood.

    Create your Own Linux Distribution

    Yes, you read that right! With Linux, you can create your distribution. Endeavors like Linux From Scratch and Arch Linux allow tech enthusiasts to compile and create their Linux systems from the ground up. It is an advanced project, but it surely is a worthwhile challenge for any Linux beginner determined to deepen his Linux knowledge.

    Learning Linux: A Rewarding Journey

    Taking on Linux projects for beginners is not only a great way to learn Linux but also an opportunity to meet and collaborate with other open-source enthusiasts. It allows you to forge a deep connection with the Linux ecosystem, equipping you with all you need to venture into innovative and creative projects in the future.

    Remember, “The journey of a thousand miles begins with a single step.” The initial steps into the Linux world might seem difficult, but embarking on such beginner projects can pave the way for smooth sailing. With strong dedication and unwavering curiosity, you’ll soon be in the ranks of seasoned Linux users. The Linux world is your oyster; start exploring!

    Keep on coding, keep on exploring, and always remember – in the world of Linux, there’s always something new to learn!

    Happy Linux coding, folks!

  • Choosing the Best Distro for Your Server: A Comparison of Top Distributions

    Choosing the Best Distro for Your Server: A Comparison of Top Distributions

    When setting up a server, one of the most crucial decisions one has to make is the choice of the operating system. Linux, with its plethora of distributions, offers a vast array of options. This journey of choice often takes us down the path where we debate Debian vs Redhat, Debian vs Arch, and Debian vs Ubuntu server distributions. All these are excellent Linux operating systems, but which is the ideal distro for a server? Let’s make that decision easier by taking a deep dive into these options.

    Debian as a Server Distribution

    Arguably one of the grandfathers of Linux distributions, Debian boasts a rich history of dependability and stable releases. Debian is venerated for its robust package management and vast software repositories, making it a popular platform for many server applications.

    Debian’s stability is its pillar strength, which essentially equates to fewer system crashes and a secure environment, a crucial aspect for servers. However, this stability comes at a cost since Debian does not always get the latest software updates promptly.

    Redhat: A Time-Tested Distro for Server

    When we pit Debian vs Redhat, there’s one crucial aspect where Redhat often gains an edge – commercial support. Redhat nodes state-of-the-art features, stability, and a great level of corporate backing, courtesy of its proprietary conventions.

    While Redhat stands as a potent distro for server applications, it is best suited for corporate infrastructures where a licensed product with professional support is vital. The downside, though, could be its lesser friendliness towards newbies, especially those accustomed to Debian-based distributions.

    Ubuntu Server Distributions

    If we delve into the Ubuntu vs Debian server debate, Ubuntu surely attracts with its user-friendliness and generous software repositories. Ubuntu is based on Debian, hence inheriting Debian’s stability and robustness but further adds frequent updates.

    What sets Ubuntu server distributions apart is its 5-year Long Term Support (LTS) feature, ensuring users receive security updates for a longer span without needing a full upgrade. When comparing Debian vs Ubuntu server, Ubuntu’s support network and extensive online resources can tilt the balance in its favor.

    Arch: The Customizable Choice

    Another commonly considered option when choosing a distro for the server is Arch Linux. The power of Arch lies in its simplicity and user-driven design. It offers a rolling-release approach, assuring users receive the latest software updates without a complete system overhaul.

    Comparing Debian vs Arch, the latter is more customizable, enabling users to tailor the system according to their specific needs. This customization, unfortunately, also makes Arch somewhat complex to set up and manage, especially for beginners.

    The Best Distro for Server: A Conclusion

    Deciding on the best distro for your server is a complex task and depends mainly on what you want your server to do and your level of expertise. Debian offers trusted stability, Redhat comes with commercial support, Ubuntu combines user-friendliness with extensive resources, and Arch provides unique customization options.

    Each of these distributions has its strengths and weaknesses, but which one is the perfect fit for your server depends on your needs and expertise. Always remember, the server is all about stability and reliability, so choose a distribution offering the best balance between these aspects and features. Happy server hunting!

  • Introducing Flameshot: More Than Just a Snipping Tool for Linux

    Introducing Flameshot: More Than Just a Snipping Tool for Linux

    Every Linux user understands the importance of a reliable snipping tool. It’s crucial in everyday computing tasks, whether you’re screenshotting a critical error message to forward to your IT department or capturing an on-screen design for inspiration. One particular tool stands out from the crowd – Flameshot. It’s much more than a snipping tool for Linux; it’s an extremely flexible and potent utility that fully justifies a closer look.

    Flameshot: Why Choose it?

    Flameshot has quickly carved out a reputation for being a highly reliable and efficient snipping tool for Linux. With its rich functionality and user-friendly interface, each screenshot task is a breeze. Yet, the flexibility doesn’t end with a quick ‘point and shoot’.

    Flameshot ensures that users have full control over what they capture. It also offers a suite of editing tools for instantly annotating, highlighting, or obfuscating parts of the screenshot. The convenience of annotating your image on the fly makes it a standout feature of this tool. Furthermore, the ease of use doesn’t translate into a loss of functionality, which is often the trade-off with more user-friendly software.

    Unleashing Flameshot’s Full Potential

    After installing Flameshot, the snipping tool integrates neatly into your Linux system. The first usage may surprise you, as the snipping tool takes over the entire screen, turning your entire display into a potential screenshot. With an elegant user interface and intuitive controls, cropping an image has never been this interactive and enjoyable.

    For users that require further detailing on their screenshots, the GUI provides numerous on-screen annotations. Simply click the pen or arrow symbol to add text, draw shapes, or point out critical parts of your screenshot. These features are the bread and butter of Flameshot and what makes it more than just a snipping tool for Linux.

    Beyond the Basics: Other Flameshot Features

    In addition to the core screenshot and annotating functionalities, Flameshot brings more to the table. This makes it an extremely well-rounded tool.

    Upload to Imgur: Quick and direct screenshots uploads are made possible with Flameshot. With just one click, you can share work with teams or provide visual aid during online discussions.

    Open in another app: Flameshot goes beyond offering the basic save option by integrating with other applications on your system. With this feature, your screenshot is ready to insert in a document or tweak in your preferred image editor – immediately after capturing.

    Configure your own keyboard shortcuts: This feature lets you use Flameshot in a way that suits you best.

    Conclusion: Flameshot, A Must-Have for Linux Users

    Indeed, Flameshot is more than a snipping tool for Linux. It’s a practically designed, feature-rich utility that every Linux user will appreciate. Whether you need a screenshot tool for your professional needs or personal use, Flameshot should be at the top of your list. Its unique blend of usability and potency marks it out as not only an essential screenshot tool, but as a key asset for Linux users in any context.

    Above all, it’s a tool designed with users in mind, focusing on delivering what they need most — functionality, flexibility, and convenience. Don’t content yourself with less; experience the exceptional Flameshot difference today.

  • Jellyfin vs Plex: A Comprehensive Comparison of Media Servers

    Jellyfin vs Plex: A Comprehensive Comparison of Media Servers

    Media servers have become increasingly popular, thanks to our insatiable need for on-demand media content. Two of the most popular options are Plex and Jellyfin. But which one should you choose? This article will present a comprehensive comparison of Jellyfin vs Plex to help you make an informed decision.

    Jellyfin: An Open-Source Contender

    Jellyfin is an open-source media server software, which means it’s developed collaboratively, and developers can freely modify and distribute the source code. Built on the ashes of Emby (a similar media server software), it aims to give you full control over your media.

    Notable Features: - Completely Free and open-source - No advertisements or tracking - Wide variety of plugins

    Whether you’re streaming your favorite movies, TV shows, music, or even live TV, Jellyfin covers you without dipping into your wallet. Furthermore, being open-source means Jellyfin respects your privacy—there is no data collection, no premium models, and zero advertisements.

    Plex: The Established Media Server

    Plex, on the other hand, operates on a freemium model. It allows you to organize and stream media content across multiple devices, but unlocking advanced features requires a Plex Pass subscription.

    Notable Features: - Free with optional subscription - Extensive device compatibility - Impressive UI and UX

    Plex boasts an impressively polished interface, so if you appreciate slick visuals and a seamless user experience, this could be your platform. With Plex Pass, you can enjoy features like mobile sync, premium music features, and more.

    Jellyfin vs Plex: The In-Depth Comparison

    When comparing the Jellyfin vs Plex, several factors come under scrutiny. Let’s dive in.

    Accessibility and Cost

    Jellyfin is free and offers a range of features without cost. Plex, although free to use, hides certain premium features behind a subscription.

    Jellyfin = Free Plex = Freemium

    User Interface and Experience

    Plex has an edge here with its smooth and visually pleasing interface. However, Jellyfin, despite a simpler interface, has its appeal with less clutter and bloat.

    User Interface: Plex = Superior Jellyfin = Functional

    Privacy

    If privacy is a concern, Jellyfin is undoubtedly the winning contender; it provides a completely private and ad-free experience. Plex, while it does collect some usage data, ensures it is anonymized and aggregated.

    Privacy: Jellyfin = Full Privacy Plex = Limited Privacy

    Flexibility and Customizability

    Again, the open-source nature of Jellyfin triumphs in this aspect. With the freedom to modify software code, you have unlimited potential for customization. Plex isn’t as versatile, but it does offer vast device compatibility.

    Flexibility: Jellyfin = Highly Customizable Plex = Broad Device Compatibility

    Final Thoughts: Jellyfin vs Plex

    Choosing between Jellyfin and Plex largely depends on your needs and preferences. Are you looking for a sleek, commercially supportive platform with a subscription-based model, or do you prefer a fully free, open-source platform that prioritizes your privacy and grants you full control?

    While Plex is excellent for those willing to pay for aesthetics and comfort, Jellyfin appeals to those wanting a truly customizable, free solution. Your choice between Jellyfin vs Plex should align with what you value most in a media server.

    Happy streaming!

  • Install Winetricks on Debian – It’s Easy!

    Install Winetricks on Debian – It’s Easy!

    In the world of open-source operating systems, Debian has been a long-time favorite for both personal and business users. Known for its robustness, reliability, and extensive software libraries, it’s a strong contender for any tech enthusiast. One such feature-rich software library popular among Debian users is ‘Winetricks’. This blog post aims to guide you through an easy peasy tutorial on how to install winetricks on Debian. So let’s dive in!

    What is Winetricks?

    Just before we delve into the installation process, let’s have a brief look at what Winetricks really is. Winetricks is a helper script that enables users to install various applications and games on a Win32 platform using Wine, the Microsoft Windows software emulator.

    Winetricks acts as a smart tool for downloading essential runtime libraries that many Windows programs need to run properly on Debian. It runs beautifully with Wine, making Windows software more available to Linus users.

    Getting Your Debian System Ready

    Before we begin with the installation process, a few preparatory steps need to be executed on your Debian system.

    Firstly, we must ensure that the system is up-to-date. Execute the following command to start the process:

    sudo apt update && sudo apt upgrade

    By doing this, your Debian system updates and upgrades all the packages installed, ensuring the latest patches and fixes are in place.

    Installing Wine on Debian

    As Winetricks is based on Wine, it is essential to have Wine installed on your Debian system first before starting your journey with Winetricks. Type the subsequent set of commands in the terminal to install Wine:

    sudo dpkg --add-architecture i386 sudo apt updatesudo apt install wine wine32 wine64

    After the installation process completes, you can confirm the successful installation by typing this command:

    wine --version

    Step-by-Step Installation of Winetricks on Debian

    Now that we have a functional Wine environment, we can proceed to install the main course — Winetricks. Follow these simple steps:

    1. First, download the script from the Github repository using the following wget command:

    wget https://raw.githubusercontent.com/Winetricks/winetricks/master/src/winetricks

    1. The above method downloads the script to your current directory. To make it accessible system-wide, move it to /usr/local/bin directory and mark it executable with this command:

    sudo mv winetricks /usr/local/binsudo chmod +x /usr/local/bin/winetricks

    1. To ensure sure Winetricks is successfully installed and working, type:

    winetricks --version

    You’re all set! Winetricks is now installed successfully on your Debian system.

    You are done!

    Installing Winetricks on Debian might seem like a complex task, but in reality, it’s straightforward and takes very less time. With this guide, you are now armed with the knowledge necessary to install and use Winetricks on your Debian system. Now, you can enjoy all your favourite Windows applications right on your trusted Debian system.

    So go ahead, command your Debian to ‘install Winetricks’ and relish the powerful combination!

  • Zorin os vs Fedora – Which one to choose

    Zorin os vs Fedora – Which one to choose

    When it comes to choosing an operating system, the debate between Zorin OS vs Fedora can become heated among Linux users. These are two robust choices, each with its own virtues and draw-offs. Fear not, as we dive deep into the comparison of these two Linux distributions to aid your decision.

    Understanding Zorin OS & Fedora

    Before we move forward with the comparison, it’s crucial you understand what Zorin OS and Fedora are.

    Zorin OS is a Linux distribution tailored for users transitioning from Microsoft Windows. It offers a user-friendly system and is designed to make your computer faster, more powerful, and secure.

    On the other hand, Fedora, sponsored by Red Hat, is a free and open-source Linux distribution. It showcases the latest in free and open-source software and strives to deliver the best of these innovations to both enthusiasts and professionals.

    User Interface: A Balancing Act

    In the Zorin OS vs Fedora battle, Zorin OS definitely wins the user interface round. Zorin OS’s desktop interface can be customized to feel like Windows, macOS, or a unique blend, making it an easy switch for newcomers from those systems.

    In contrast, Fedora uses a stock version of GNOME. While not difficult to use, it does require some getting used to, particularly for users coming from a Windows or Mac environment.

    Software Availability: A Matter of Abundance

    Both Fedora and Zorin OS do well here, each offering thousands of software packages. Yet, there are differences that might affect your decision.

    Fedora emphasizes offering open-source and free tools, and it’s an excellent choice for developers because it routinely includes the latest programming tools.

    Conversely, Zorin OS includes several proprietary software out-of-the-box, like Google Chrome and some third-party app stores, which make software installation even easier.

    Stability & Performance: A Rock Solid Comparison

    Fedora’s philosophy revolves around innovation, often incorporating the latest tech into its system, which can occasionally lead to instability. But don’t misunderstand, Fedora is still a very stable Linux distribution.

    On the contrary, Zorin OS places emphasis on stability over cutting-edge features, as it is based on the robust Ubuntu LTS releases. Performance-wise, both Zorin and Fedora are similar, providing suitable responsiveness and speed.

    Security: Lock and Key

    Both Zorin OS and Fedora take the crown when it comes to security. Zorin boasts of a resistant architecture that protects against viruses and malware. In addition, security patches are released regularly.

    Fedora, backed by Red Hat, has a strong commitment to security and provides discretionary access control through SELinux. This ensures robust security out-of-the-box while maintaining user convenience.

    Community & Support: Strength in Numbers

    The Linux community is a force to be reckoned with, and both distributions boast strong ones. Zorin OS has a free basic edition, but paid versions come with premium support. Fedora, having Red Hat as the sponsor, has a large and active support community ready to assist with any issues.

    Conclusion: The Choice is Yours

    In the end, your choice between Zorin OS vs Fedora largely depends on your individual requirements. For users switching from Windows or Mac, Zorin might be the more appealing choice, thanks to its user-friendly interface. Developers and open-source affectionados might veer towards Fedora with its latest tools and Red Hat backing.

    Both Zorin OS and Fedora are great operating systems that have lured numerous users with their unique features. Make sure you weigh all of these factors in your decision, and happy exploring!